As we added playframework 2 support in eclipse , let's start our first play 2 application
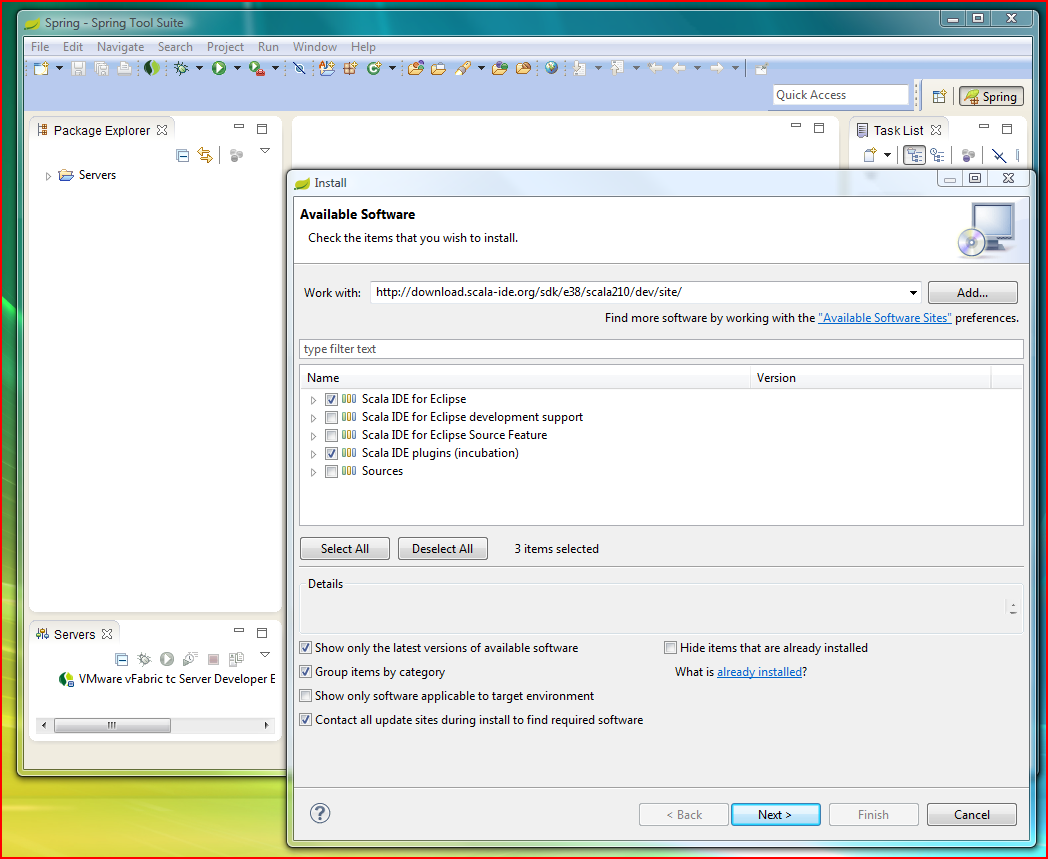
You must switch to Scala perspective

to add support for play template with scala code.

To run the Play framework, you need JDK 6 or later.
You can make sure by typing java and javac commands in the current path
(you can check this by typing java -version and javac -version at the shell prompt).
If these commands are not known by your command line, you can check this "How do I set or change the PATH system variable? tutorial" to set the JAVA_HOME environment variable.

Step1: Go to http://www.playframework.com/ and take the binary package from the download section
Download the latest Play binary package (the last version while I am writing is 2.1.0)
and extract the archive to a location where you have both read and write access because play writes some files to directories within the archive.
Set PLAY_HOME as environment variable and add it to your system PATH.
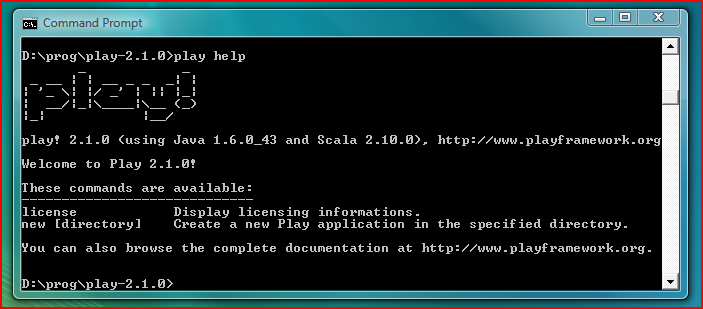
Step 2: Check that the play command is available
From the shell, launch the play -help command.
Step 3: Create a new application with the play command
It's very easy to create a new application, just with the "play new" command:
I chose "ecompass" as my application name
> play new ecompass

Once the application has been created you can use the play command again to enter the Play console .
> cd ecompass
> play

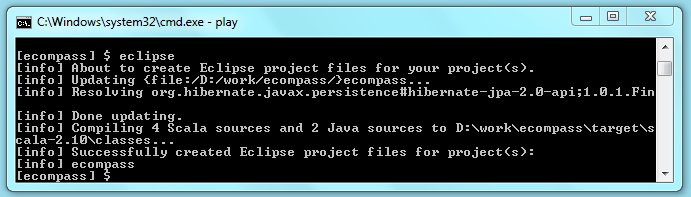
Now we can test our application and develop it with eclipse. While in the play console run "eclipse" command to create the project files, it would help us to import the project after.
[ecompass] $ eclipse

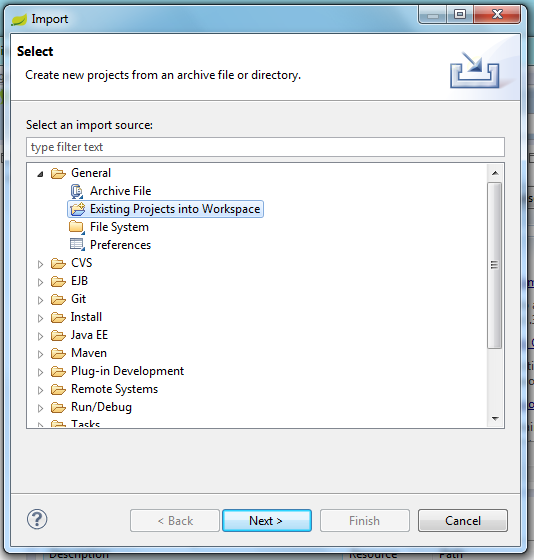
We'll import from eclipse the project

in "General" as "Existing Projects into Workspace" project
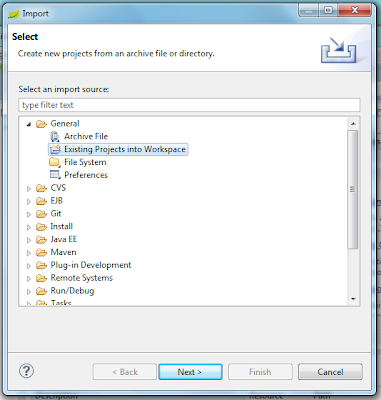
"Next > ", you have to "Select root directory" the location of the created project

and "Finish".

Step 4: Test the created application
- the Play console is a normal sbt console, so you can use sbt features such as triggered execution (note the included symbol tilde - "~") - (more about play console in another future blog post)
- run the command "~run", this will enable the triggered compilation while a development server is running
[ecompass] $ ~run

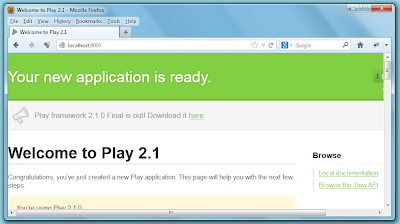
then browse the address http://localhost:9000/
Now let's test the hot-code reloading feature, modify the message in eclipse from our controller, in the index method, from "Your new application is ready." to "Hello Java World!".

save the file, you'll see in the command line that the Application.java class is compiled on the fly

and if you hit refresh on your browser you'll see the new message

cool, isn't it?
Step 5: A few more tweaks are required for integration:
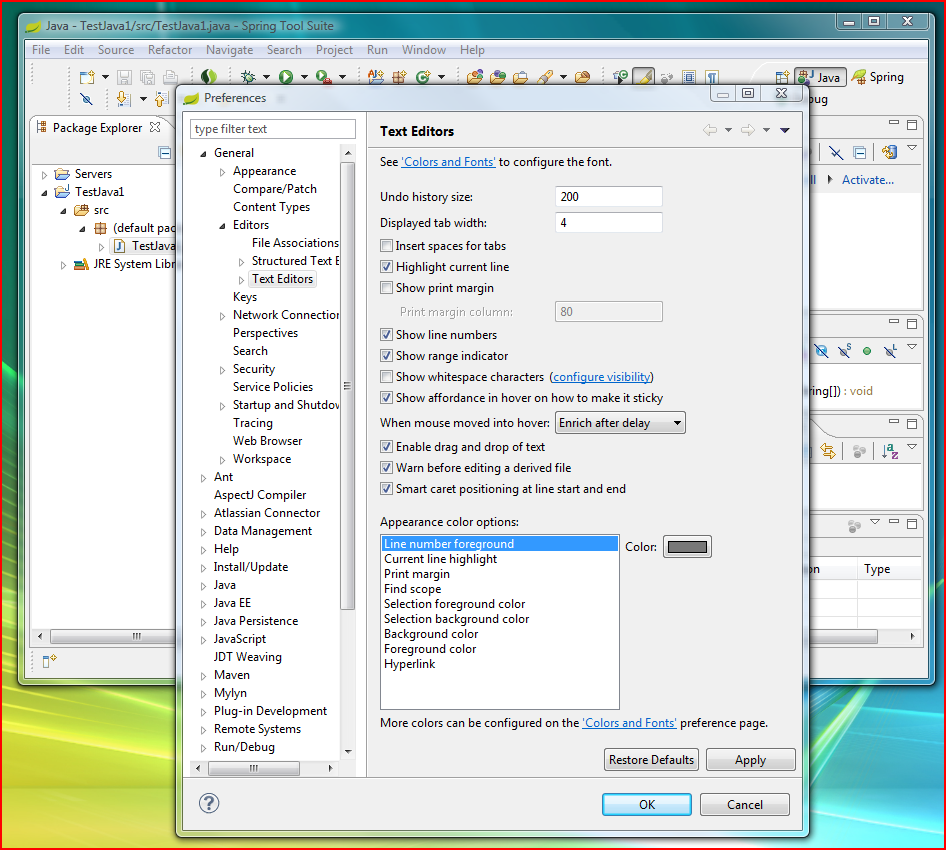
- configure eclipse so changes made by play on the file system are automatically reloaded in eclipse (Window > Preferences > General > Workspace) check "Refresh using native hooks or polling";

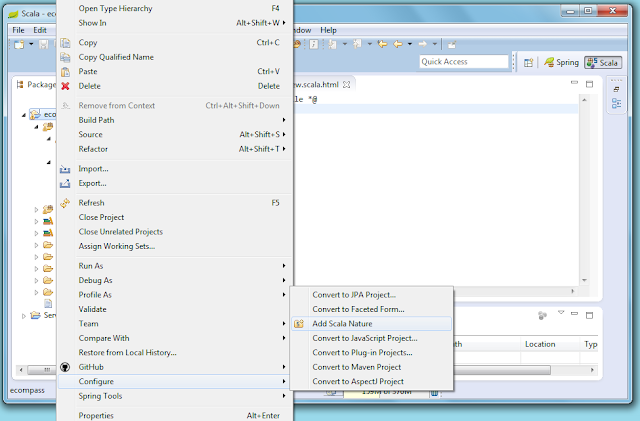
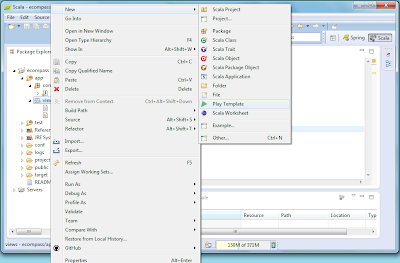
- to get scala code auto-complete in the play template we need to set the project with "Scala nature";
- create new play template;
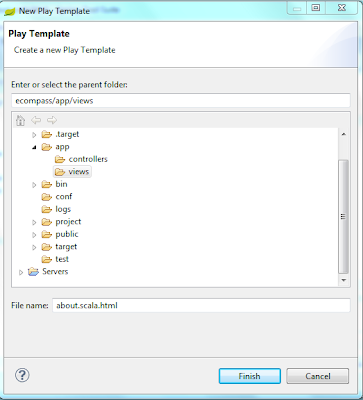
this is how the created template looks, but we'll add some content

and the file editor association (Window > Preferences > General > Editors > File Associations) and for ".html" extension we select the "Template Editor" and make it default;

Now back to our new template we have syntax highlighting and auto-complete (content assist)
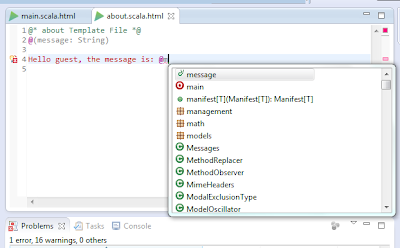
Back to our Application.java class, let's use the "about" template, the view (play template - about.scala.html) is recognized by eclipse

setting a "secret" message

and we'll see it when refreshing the browser.

Tips:
- be sure you have your workspace configured to work with UTF-8 encoding;

- to stop the running server you have to press "Ctrl + D" followed by "enter".
[ecompass] $ eclipse
We'll import from eclipse the project

in "General" as "Existing Projects into Workspace" project
"Next > ", you have to "Select root directory" the location of the created project

and "Finish".

Step 4: Test the created application
- the Play console is a normal sbt console, so you can use sbt features such as triggered execution (note the included symbol tilde - "~") - (more about play console in another future blog post)
- run the command "~run", this will enable the triggered compilation while a development server is running
[ecompass] $ ~run

then browse the address http://localhost:9000/

Now let's test the hot-code reloading feature, modify the message in eclipse from our controller, in the index method, from "Your new application is ready." to "Hello Java World!".

save the file, you'll see in the command line that the Application.java class is compiled on the fly

and if you hit refresh on your browser you'll see the new message

cool, isn't it?
Step 5: A few more tweaks are required for integration:
- configure eclipse so changes made by play on the file system are automatically reloaded in eclipse (Window > Preferences > General > Workspace) check "Refresh using native hooks or polling";

- to get scala code auto-complete in the play template we need to set the project with "Scala nature";

- create new play template;


and the file editor association (Window > Preferences > General > Editors > File Associations) and for ".html" extension we select the "Template Editor" and make it default;

Now back to our new template we have syntax highlighting and auto-complete (content assist)

Back to our Application.java class, let's use the "about" template, the view (play template - about.scala.html) is recognized by eclipse

setting a "secret" message

and we'll see it when refreshing the browser.

Tips:
- be sure you have your workspace configured to work with UTF-8 encoding;

- to stop the running server you have to press "Ctrl + D" followed by "enter".